Sunday, April 30, 2017

Brick & Brass Fireplace Makeover In A Day

This quick update is a one day commitment and can cost $30 or less, depending on what you have on hand.

A friend recently asked for help in her home. She and her husband work and have two daughters. Time is a commodity and her home has not had much updating since she moved in. She wants something light and fresh, maybe with touch of coastal/beach. (Insert; me happy dancing!) Her oldest is graduating college and her youngest is graduating high school in June. There will be parties and visitors and the clock is ticking. While she would like to do the kitchen, dining and living room we have decided to focus on the living room for time and budget sake.


My first hurdle was one wall in the living room. It is covered with faux bricks and an off-centered fireplace with a dated brassy-gold metal surround.

                                              *Sorry for the bad photo. I used my phone.

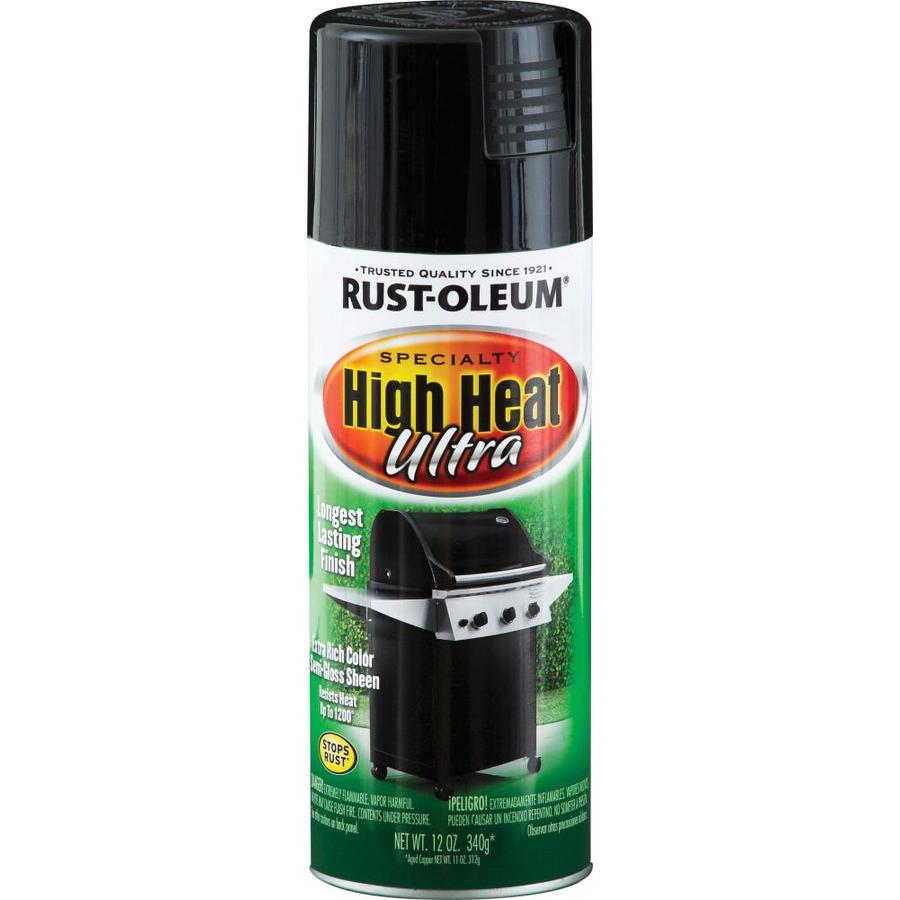
The family cleared the living room and took off to visit colleges leaving the room for me to work in for two days. First up was that brass surround. I tried to remove it-that was plan A, but no luck. It wouldn't budge. Okay...I am not deterred. Plan B- I taped of the glass on the fireplace screen and taped paper around the brick to protect from over spray. I put a paper inside the fireplace in case any paint made it through the cracks. I put down drop cloths (-everywhere!!) and grabbed my high heat Rustoleum spray paint. ($7) I used black.

Product Image 1

This took 3 coats. If you are attempting this here are my pointers: Open windows between coats (to prevent the paint from blowing around). Follow the directions and allow each coat to dry. Three thin coats are much better than a thick coat that may run and ruin your project. Start spraying on the paper then in a back and forth motion spray your frame, being sure to keep the appropriate distance. Take your time.

Now to tackle the rest of the wall. There were bricks that had come dislodged. I reapplied them with Liquid Nails and taped it in place to dry. Some of the bricks were cracked. I used spackle (I had this on hand) and a small putty knife to fill the cracks. I was not too concerned about smooth surfaces. Once the cracks were spackled over I grabbed my white and off white chalk paints.
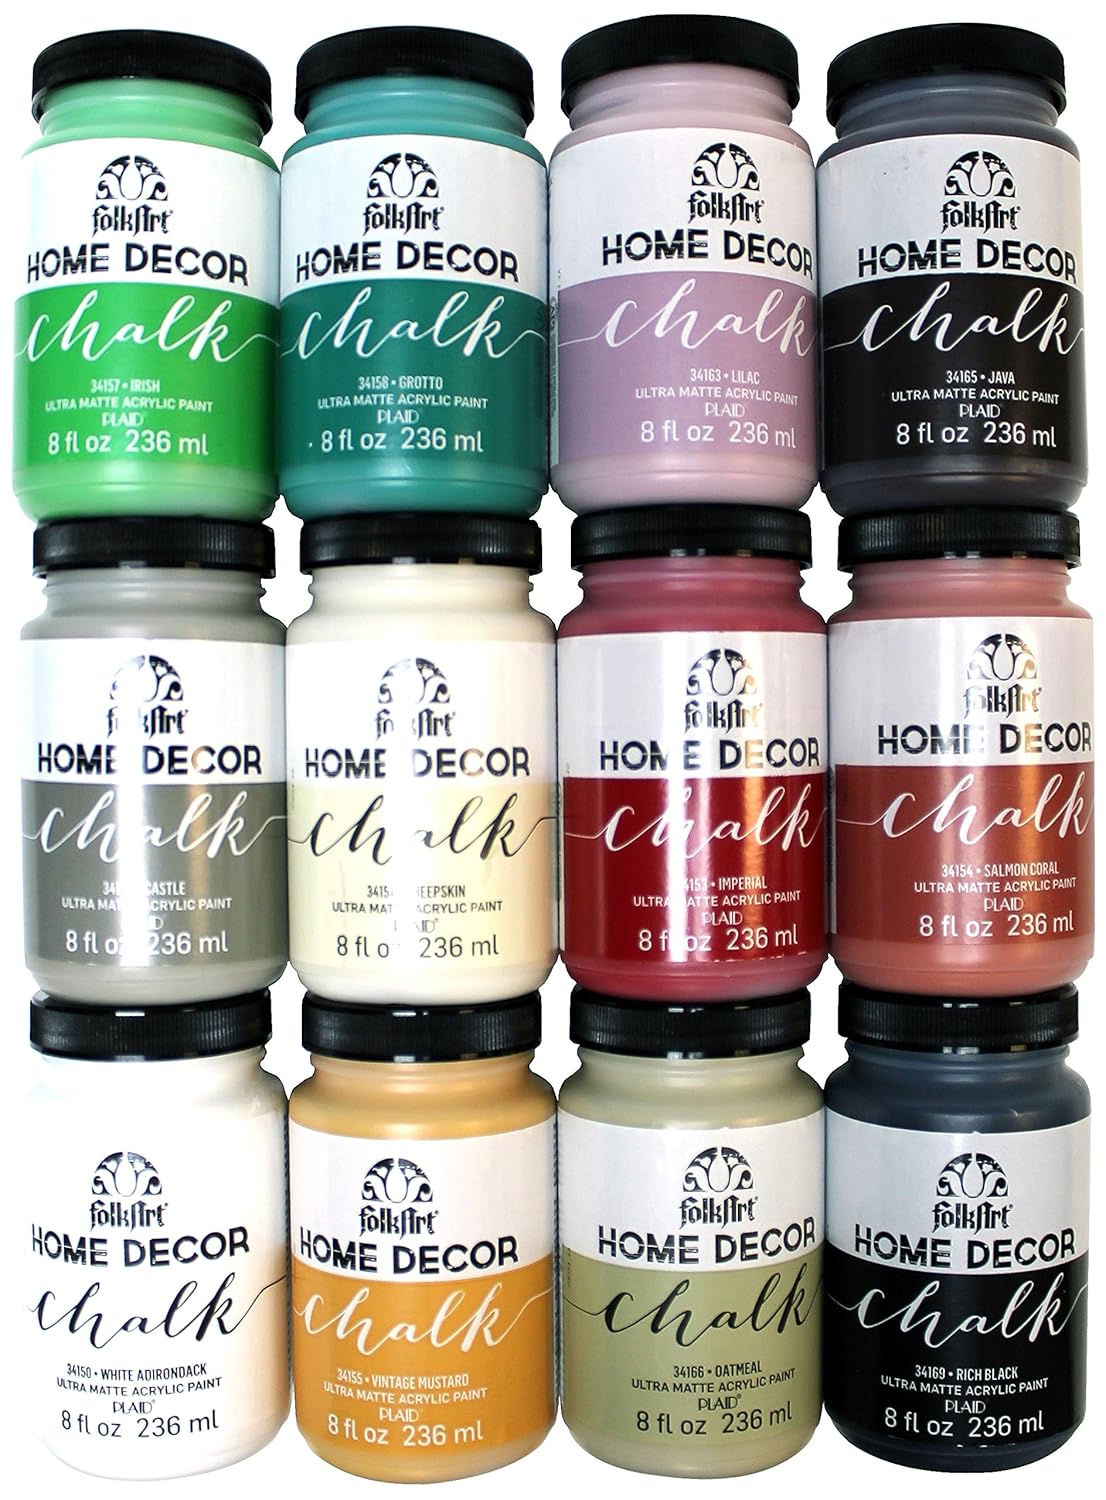
I used Folk Art Home Decor Chalk paint; purchased at A.C. Moore. They were on sale and I picked up three colors for $21. While it did take all the white I purchased, I used very little of the off white and taupe/gray color.


I poured some of both whites onto a paper plate. Using the same putty knife I dragged the paint onto random bricks. After the paint and spackle were dry I used a sanding block to knock down and edges or marks not consistent with the look of the bricks.


Using a 1:3 ratio I mixed white chalk paint with water. That is 1 part chalk paint to 3 parts water. Stir, stir, stir and then stir some more. you will need to continue to stir as you are applying as the paint tends to want to settle. Now the messy part. I used a chip brush, nothing expensive, and worked in about three foot square sections. Brushing on the paint is messy and drippy. The bricks are porous and take the paint quickly. The grout was a little more resistant but I got the hang of it. I used a rag to dab and rub to my liking. There is no right or wrong way to this.


Standing back, I like the look, I think. I will keep going to get one coat on everything. At this point I realized I should have protected the fireplace surround I had just painted so I had to stop and cover it. (I just get so excited when I get something done that I like to look at it but now was not the time.)


I liked this look but we were going for something different based on photos my friend/client had found on Pinterest. While this dried I got a coat of new paint color on the walls.

The brick was dry. I grabbed another chalk paint in a tan color mixed in the same 1:3 ratio. I brushed this on random bricks. And, that did it. That was the look we were after. I used the sanding block and sanded through some of the paint wash to see a bit of the brick color in some spots but ever so lightly. Depending on the look you're after you can sand more. the chalk paint is easy to sand through.


The colored bricks on top need a little white wash and a sanding to match the bottom ones.


I removed that paper and tape from the fireplace. This part of the project took only a few hours but I did paint the walls and got a coat of paint on the trim the same day. I'll come back the next day to give the walls and trim a second coat but the fireplace is done... Now it needs a mantel ....


Stay tuned.... 
and yes, I am still working on my own house!


Linking up to these parties:
The Chelsea Project, Cedar Hill Farmhouse, Coastal Charm, I Should Be Mopping The Floor, Skip To My Lou, Creatively Living, Plucky's Second Thought, Strangers and Pilgrims On Earth, A Stroll Thru Life, Our Home Away From Home, Ducks n'a Row, The DIY Dreamer, Savvy Southern Style, Home Stories A to Z, Mad In Crafts, The Crafty Blog Stalker, Lou Lou Girls, Celebrate & Decorate,
DIY By Design, Gratefully Vintage, Gingersnap Crafts, Mom Skills, The Vintage Nest, Joyful Homemaking, Have A Cup Of Mrs. Olson, The Pin Junkie, A Delightsome Life, My Repurposed Life, Imparting Grace, The Charm Of Home, Up To Date Interiors, Our Hopeful Home, Katherine's Corner, Craftberry Bush, French Country Cottage, the DIY Village, Life With Lorelai, The Boondocks Blog, Shabby Art Boutique, The Cottage Market, DIY Vintage Chic, Olives N Okra, Ms ToodyGoo Shoes, Pieced Pastimes, One More Time Events, Finding Silver Pennies, Nifty Thrifty Things, Reasons To Skip The Housework, DIY Showoff, Create With Joy, Re Do It Yourself, Stonybrook House

Monday, April 17, 2017

Antique Farmhouse Master Bedroom

Ya'll, my bedroom is done! I have been dying for warmer weather so I could strip off those flannel sheets, dress her up nice and show you! Hang on!

Often when purchasing a fixer-upper the master bedroom is the last room to see some lovin'. In hindsight it should probably be the first room to get done so that at the end of a long day there is a beautiful space to retreat to.


When we purchased our home fourteen years ago there was little money to do much more than necessities and paint. We painted the room a warm, sweet yellow. We were not planning to redo our bedroom but this happened!


Our bedroom furniture has been with us since we got married; when sleigh beds were all the rage. It has moved with us four times since then and has the scars and scratches to prove it. that being said it is still in good shape and I didn't really want to have to replace it. I did want to remove the foot board on the bed, though. Mister brought home a queen-sized hollywood frame that someone was tossing out. He used parts of it to support the foot of the bed frame, securing it to the side boards. 

Now, a bit of a disclaimer. Don't fuss at me for not putting the bed in the right spot. I know it is customary to position the bed so that you see it full on when entering a room but we don't have the luxury of an uninterrupted wall; meaning no windows or doors. The longest stretch of wall is the wall the entry door sits on so that is where we placed the bed. It used to be placed between the two short windows. 

The walls were painted December Starlight by Valspar. It is my go-to white for all the trim in the house. While not a pure white, it has a little warmth to it, it does read white in spite of this photo looking more off white/beige. 


My inner Joanna Gaines wanted a farmhouse feel and shiplap for this room but that didn't quite work out. You can read about it here. My solution was something that is popping up all over decorating blogs now. 


This photo was also floating around the internet and served as my inspiration for this room. 

                                                                      (Source)

This was my version of an inspiration board...


The wood piece was given to us a loooong time ago. One of those things you hold on to but don't know why. (Closet hoarder.) I still don't know what this was supposed to be in it's first life. If anyone has a clue please contact me. I put in two small nails to hold the wire basket. I lined the basket with moss I had in my stash and inserted a foam block. Using my 50% coupon from the craft store,  I purchased some fake greenery and inserted it into the basket. Wah-lah!  Voila! I have an art piece over the head board on my faux shiplap wall. 


The curtains were from my living room.


I won't be using them there again and they added just the right touch of airiness to the bedroom. I cut a little slit in each end at the top and fed them on as rod pocket curtains allowing the tabs to flop over as a sort of ruffle top. 


My chandelier was a super affordable find. You can read about the search here. 


Most the bedding was purchased at Home Goods over the past five years! The only things new are the gray and white pillow cases and the fur pillow. Oh, and the gray thermal blanket from Walmart for $20. The throw blanket I borrowed from our office. 

My rug was purchased online at Rugs USA for less than $120 (source). The bed skirt was purchased from Amazon (source).


The lamps were repurposed from the living room. Remember when I was painting everything with my homemade chalk paint? 


I did purchase the little side table on the left at an antique store. I thought I would paint the base but when I got it in the room I just couldn't do it. It is the sweetest little table and I was surprised to realize it is a tilt-top! 


A little zhushing and this room is a peaceful breath of fresh air. Have a look around...


Chalkboards say "farmhouse" to me. 


My (free) roadside vanity fits right in. I used a piece of faux fur to cover the seat of a bistro chair. And, my Brimfield mirror purchased on a trip with mom years ago is perfect for this space.


This room is done. I am thrilled with how it turned out. I used a lot of things I already owned; a testament to buying what you love. You'll always find ways to use and reuse them.


Cost of this remodel: less than $400 
Value of the remodel: inestimable considering the downstairs is STILL a mess! 

If you enjoyed this post please subscribe by email or follow along through Facebook or Instagram. I try to do Twitter by my Tweeting is kinda lame. 

Attending the following parties this week:
Pluckys Second Thought, Strangers and Pilgrims On Earth, Coastal Charm, I Should Be Mopping The Floor, Skip To My Lou, Cedar Hill Farmhouse, A Stroll Thru Life, Cupcakes and Crinoline, Creative Living, Home Stories A to Z, Lou Lou Girls, Celebrate and Decorate, Our Home Away From Home, Ducks n a Row, The Newlywed Pilgrimage, My Repurposed Life, Savvy Southern Style, DIY By Design, The Vintage Nest, Joyful Homemaking, Have A Cup Of Mrs. Olson, The Pin Junkie, A Delightsome Life, Imparting Grace, The Charm of Home, Katherine's Corner, Up To Date Interiors, Our Hopeful Home, French Country Cottage, The DIY Village , Life With Lorelai, Olives-n-Okra, Shoestring Elegance, Chic On A Shoestring, Remodelaholic, Craft Dictator, The Cottage Market, Shabby Art Boutique, DIY Vintage Chic, The Boondocks Blog, Pieced Pastimes, One More Time Events, Finding Silver Pennies, Nifty Thrifty Things, Re Do It Yourself, Ms. Toody Goo Shoes, The Chelsea Project, DIY Showoff, The Painted Hinge, Life On Lakeshore Drive, Create With Joy, The Stonybrook House, Reasons To Skip The Housework, My Pinterventures, Dwellings-The Heart of Your Home, Gratefully Vintage


Sunday, April 9, 2017

Paint and Stain Test Lab

Warning! This is not one of those easy projects that make Pinterest look good. This was grueling and not for the faint of heart and as a result- this is a long post.


Now that my living room wall is planked it is ready for some color. This wall was a bit of a splurge for me so I want to make sure I don't mess it up. I want an aged, beach wood or barn wood sort of look but not really sure what I am after. Mister thought we should try a whitewash first.


Not quite what I was looking for. A trip outside to talk to a tree guy about taking down some dying trees sparked inspiration. Looking at the decaying maple tree in our yard has given me some idea of what we are after.


We did not want to use traditional stain due the smell and mess cleaning up. (I am not a neat DIYer.)

I thought I should test this out along with some ideas I have seen on Pinterest. I used all the cut pieces left over from our planked wall to practice on. This wood is pine, nothing extravagant.

I have been dying to try the instant aged technique and had read that you should let the apple cider vinegar sit with a piece of steel wool soaking in it for 24 hours before using it. I read another blogger that said she did not wait but just went right at it and got good results. I am not a patient person so after an hour I proceeded.


It left my pine kinda red-ish; not the look I am going for. Back to Pinterest...I read that if you first brush on a strong black tea that the vinegar mixture will react to the tannins in the tea and age better. , Okay, I gave it a whirl. Well, I still was not happy with that outcome, either.

                                                      Doesn't this look like Sid the Sloth?!

I decided to wait at least 24 hours like some blogs suggested. 24 hours had passed and again,  I tried just the vinegar on 1/2 of one board. Meh.  I tried the tea with the vinegar over it on the other 1/2 of the board. That time I got a darker color but still not what I want so I will press on. 

                The top of this board is just the vinegar, the bottom is tea with vinegar over it.

Mister said it was too much trouble and really wanted to find a one-step product. 

We made it to Home Depot where I found a product called Varathane Weathered Wood Accelerator (VWAA) that claims to age wood instantly without the smell of stain; water clean-up. We'll give it a shot. And, I tried the VWAA and sorta liked how it turned out but... 


thought a bit of white washed in would be the ultimate.


But, while I was at it, I wanted to try some other stuff, too...since I was practicing and all. 


Totally different direction; I grabbed leftover paint from other projects in blues and greens and brushed them onto a piece, blending the colors and mixing in a light touch of the gray. I really liked this look but it's too much for the wall. 


I used 4 tablespoons semi-gloss white paint I had on hand, mixed in 1 tablespoon of plaster of paris and 4 tablespoons room temp water to make a wash.  I brushed it over the stain and I brushed it onto a new, untouched board. Still not satisfied, I will keep going.

I used the same mixture but this time used the dark gray paint we used behind the plank wall. While I liked the outcome of this mixture I think it will be too dark for the room. We want to lighten it up.

So I did it again on another board but then whitewashed the whole thing with my plaster of paris mixture from before and gray-washed some, too. Hmm...

On each board I went back over a small section of it with the vinegar mixture to see how it would look.

I posted a picture on Instagram looking for some direction/affirmation and I got it so I happily sashayed toward my plank wall with paint and stain in hand-quite happy with the decision. (By this time that vinegar mixture I had made was a few days old and was giving me a darker color but still not quite grayish so I decided to ditch that idea and went with the Varathane Weathered Wood Accelerator)  I was all excited to start slapping that stuff up on the wood!


Once it was finished I stood back to survey my handy work and was relishing my good fortune of finding a product that worked right out of the can. Hmm...it seemed to be just a bit off from the wall color on the connecting walls. I wasn't sure if I was seeing what I thought I was seeing and then Mister rounded the corner and asked "Is that lavender?" UGH!!!! Yes!    

           No!  

       Yes, yes, sigh.
(Hanging my head loooow.) It's lavender but maybe it is just the lighting or something. Wait til the sun moves around, turn the overhead light on, do something, tilt your head, squint, anything.... UGH! It's lavender.


I could also see the edges of the wood where we had so carefully made sure to space them. They were still the unfinish pine color. That's NOT going to work. So, now my thinking was that the vinegar stuff will give it all a woodsy color over the lavender gray and it will fix it.


GAH! Nope. My wall was now completely stained in the ironized vinegar concoction and it was blotchy because I worked from the left side of the wall first, then middle, then right side. As it continued to dry it was more obvious and I hated it!

What if I dry brush some white to distract from the blotchy?


Okay, this may work. Wait. What's happening? The vinegar stuff was turning the white a yellow color... it kept bleeding through...and it stinks like... vinegar! The whole point of not using traditional stain was that we didn't want it to smell and while vinegar is not toxic it still stinks. On all my samples why hadn't I noticed this?! Ugh! 

At this point I told Mister, " I am a fraud! I have no business doing this stuff, why would anyone want to read about this?" He listened to me whine then told me that I would figure it out. Okay.

The vinegar stuff does stink. Mister said he didn't smell it but I did and felt like I had been for a few days. It only stopped once I brushed on a sealer. I used a bottle of water based wood sealer I had on hand and let it dry. The next day I hit the wall again with a watered down chalk paint in gray. Too dark.

I grabbed the white chalk paint, watered it down 50/50 and dry brushed it on. My blending skills need some work and the strokes were too much. I lightly sanded the whole wall then watered down more white chalk paint, 3 parts water to 1 part paint. With an old rag I washed the watered down paint on the wall.


Ahh..... there it is. Not exactly what I started out wanting but with the adjacent wall color and the media cabinet I think it will do quite nicely. I lost most of the knots in the wood and the grain. A little of it does show through but not like I had started out wanting, but that's okay. I like the layers of colors.


Mister painted the lattice strips down each side the same color as the adjacent wall color. Leaving them like the wood planks seemed too messy going in different direction than the planks. Because of the spacing and the dark wall color behind the planks it does resemble a painted shiplap effect. I've been staring at it for about a week now and I have decided that I love it.


Next stop for this room is crown molding and then everything gets another coat of paint. Getting close to end in this room and I am so ready! Can't wait to share it with you, too!


Important things to remember (learned from hours of missteps):

#1 It would have been much easier to do the edges before it was put up on the wall.
#2 Work one row at a time-don't stop and don't overlap. If you don't heed this warning it will be blotchy.
#3 Vinegar stinks.
#4 If you plan to paint over the vinegar stain you have to seal it so it doesn't bleed through.
#5 Don't give up! It may not turn out the way you wanted it to originally but you can end up liking  the finished product as much or more than the original plan.


If you enjoyed visiting with me please subscribe by email or follow along through Facebook or Instagram.

Linking up at these parties:
Happiness Is Homemade, I Should Be Mopping The Floor, Creatively Living, Plucky's Second Thought, Mad In Crafts, Coastal Charm, Skip To My Lou, Cedar Hill Farmhouse, Cupcakes and Crinoline, Celebrate and Decorate,  A Stroll Thru Life,Home Stories A to Z, The Crafty Blog Stalker, The Lou Lou Girls , Savvy Southern Style, Gingersnap Crafts, My Repurposed Life, DIY By Design, Ducks n'a Row, Gratefully Vintage, The Newlywed Pilgrimage, The Vintage Nest, Joyful Homemaking, Have A Cup Of Mrs. Olson, The Pin Junkie, A Delightsome Life, Our Hopeful Home, Up To Date Interiors, Katherine's Corner, Imparting Grace, The Charm of Home, Life With Lorelai, Shoestring Elegance, Olives n Okra. French Country Cottage, The DIY Village , The DIY Village, Shabby Art Boutique, Chic On A Shoestring, The Cottage Market, DIY Vintage Chic, The Boondocks Blog, Blooming Homestead, Ms Toody Goo Shoes, Pieced Pastimes, One More Time Events, Finding Silver Pennies, Nifty Thrifty Things, Re Do It Yourself, Stonybrook House, Dwellings-The Heart of Your Home, Create With Joy, Reasons To Skip The Housework, The Painted Hinge, My Heart Lives Here, Life On Lakeshore Drive, The Newlywed Pilgrimage, Remodelaholic, Craft Dictator, DIY Showoff, The Chelsea Project, Life On Lakeshore Drive, My Pinterventures